PowerPoint Tutorial
Introduction
This tutorial was created to teach you the basics of how to create a PowerPoint presentation and post it to the web via Blackboard. You will learn how to add multimedia elements to your presentation and ensure that these elements are included and play correctly everytime it is viewed.
Many courses at USF require students to create PowerPoint presentations to fulfill assignments. Sometimes, knowing how to use PowerPoint is a prerequisite. However, even if you've used PowerPoint before, tasks such as including multimedia and delivering your presentation over the web via Blackboard can present a challenge. The instructions provided in this tutorial will help you to avoid the frustration of uploading a presentation with a missing image or movie, or a sound that doesn't play when it should.
This tutorial will cover how to…
• save PowerPoint files to your computer (and find them again!),
• enrich your presentation with pre-designed templates - or make your own,
• include multimedia in your presentation that plays back properly no matter where you present it, and
• present your video over the web via Blackboard.
This presentation was designed using examples from PowerPoint 2002 on Windows XP. However, additional explanation is included for Mac users and those with access to a different version of PowerPoint so that anyone taking this tutorial will be able to apply the lessons to their specific platform and software. Such notes will appear in a display box just like this.
Read through the tutorial to gain an understanding of the basics of creating a PowerPoint presentation. To apply what you've learned, print the tutorial and use it as a guide when creating your next presentation.
Please direct feedback, suggestions and questions about this tutorial to lwestpha@hsc.usf.edu.
Create a Project Folder on Your Computer to Save Files
Whenever you begin a new project, it's a good idea to first create a Project Folder in which to save your files. This will allow you to more quickly save and retrieve your work.
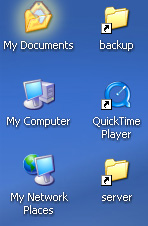
If you're using a windows computer, such as Windows XP, use the My Documents folder to organize project folders and other documents that you create. Windows automatically creates a My Documents folder on your computer for you. It is normally located on your C: drive. In Windows XP, you would find it within the 'C:\Documents and Settings\your username' folder. A shortcut to your My Documents folder is also normally found on your desktop (see example screen below) and via your Start menu.
Double-click on the My Documents folder on your desktop (or select it from the Start menu) to open it.
In Mac OS X you would use the Documents folder located in the Finder.
The next step is to create the project folder itself. Create a new folder named with the name of your project. Be as descriptive as possible. Your PowerPoint file will go directly into your new project folder for easy access.
Create the following subfolders that will also reside in your project folder.
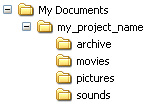
archive - You will use this folder to store out dated files for your project that you don't want to throw in the trash, such as previous versions of your presentation. Doing so will help to prevent you from mixing-up an old version of your presentation with the most current version.
movies - Your digital video files will go in this folder.
pictures - Store all of your graphics, photos, illustrations and clipart for your presentation here.
sounds - Music, sound effects and narration belong in this folder.
If you follow this strategy consistently with all of your projects, you'll be better able to quickly and easily find files in the future. You'll know just where to go to find all of your project folders neatly organized, and you'll know which is which because you've named each folder descriptively.
Create a New PowerPoint File
When you open a new PowerPoint file, save it immediately. It's helpful to get housekeeping tasks, such as naming the file and deciding where to save it, out of the way first. That way, you can quickly and easily save your work often as you go along and avoid losing everything to an unexpected computer crash.
This step will be easy if you've already created a Project Folder. You'll already know where you're going to store your file - you just have to name it.
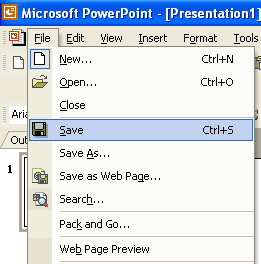
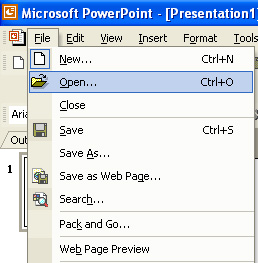
To save your PowerPoint file for the first time, begin by selecting Save from the File menu.
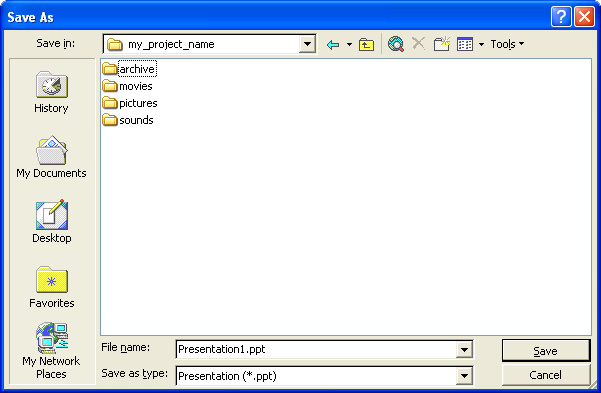
You will be presented with a dialog box that you can navigate with to select your save location. Locate your project folder.
If you haven't already created a project folder, select an appropriate location and create one now. Make sure the location you select is easy to remember so that you can find your project folder later. Also be sure to name your project folder descriptively to that you'll be able to distinguish it from other project folders that you keep in the same location.
Open your project folder.
Now it's time to name your presentation file. Make the name as descriptive as possible so that you can later identify exactly what that file is by name.
Click the Save button to save your file.
Open an Existing PowerPoint File
Let's say that you had been working on your presentation, saved and closed the file. A few days later, you want to go back into the file to complete your work. One way to open a PowerPoint file is to locate the file itself within your computer and double-click to open it from there. Another way to open the file is from within the PowerPoint application.
Launch the PowerPoint application then select Open from the File menu.
You will be presented with a dialog box that you can navigate with to select your save location. Go to your project folder, click once on your PowerPoint file, then click the Open button to open it.
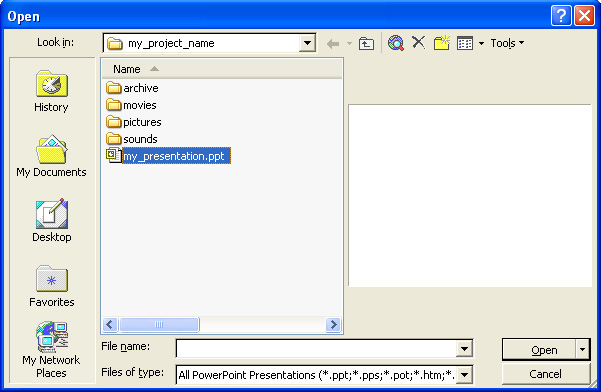
If you created a project folder for your presentation in an obvious location, then it should be easy for you to find the most recent version of your PowerPoint file. If you're having difficulty locating it, use the Search feature located on your windows Start menu to look for the file before you try to open it.
Use Sherlock to search for files on a Macintosh.
If you can't remember the exact name of your file, just type a few letters that you think are in the filename and perform your search with those. This should work well if you named the file descriptively.
Select a PowerPoint Template for Your Presentation
Using a template for your presentation will help to give it an organized, professional look. Your PowerPoint application should already have several templates from which you can choose. If you want to try a new look, download additional PowerPoint templates in the Microsoft Office Template Gallery. If your instructor provides you with a template, open the PowerPoint file with the template that he or she provides, and that template will be available for your use.
Select Slide Design... from the Format menu to view the available templates.

If you're on a Mac, or if you're using a different version of PowerPoint, your menu options may be different. For example, with previous versions of PowerPoint, you would select Apply Design Template from the Format menu instead.
Click once on the template of your choice. It will automatically be applied to your presentation.

Most templates have a specific design for the title screen (the first screen) in your presentation and a different design for the rest of the slides. Whenever you add a new slide to your presentation, normally the slide page design for the template you are using will be applied. You can not alter these templates while you are creating your slides. This is a helpful feature because it prevents you from inadvertantly moving a background image or changing a design element. However, there may be times when you need to access and change the template (e.g., you might want to customize a template using your own graphics).
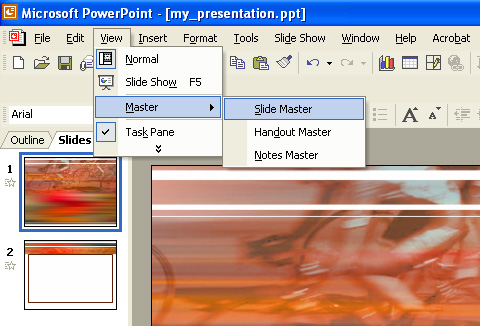
To access templates, select Slide Master, from the Master sub-menu located on the View menu in PowerPoint.
Select Normal from the View menu to return to the normal view and continue editing your slides.
Insert Pictures into Your Presentation
PowerPoint comes complete with a searchable array of drawings and photographs that you can use in your class presentations. You can download additional picture from the Microsoft Clip Art and Media Gallery. New media is added all the time!
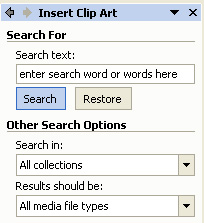
Select Clip Art from the Picture sub-menu on the Insert menu to open the Clip Art search panel.
In the search panel, you can select different collections to search within and different media file types form which to choose. If you only want to look for pictures, you would select Clip Art and Photographs. However, if you want to look for sounds or movies, those options are available here as well.
Enter the word or words describing the type of picture for which you would like to search then click the search button.
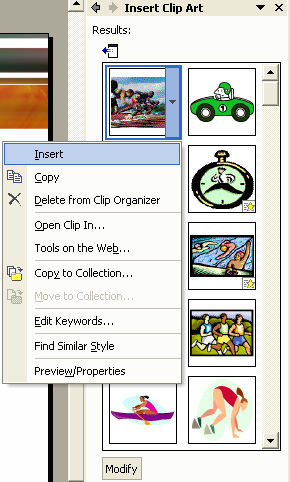
You will then see thumbnails of all of the available media matching your specifications. When you find the picture you want, click on it once then select Insert from the drop-down menu.
What if you have your own pictures, stored on your computer or a CD-Rom, that you would like to use in your presentation?
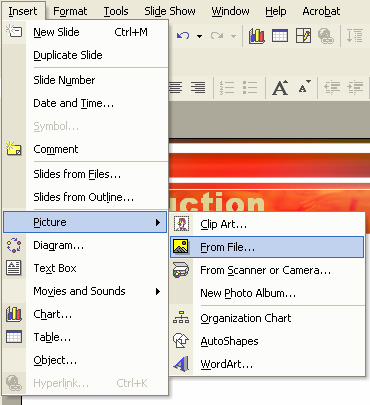
You would select From File... from the Picture sub-menu located on the Insert menu. You would then be presented with a dialog box with which you could navigate through to locate and insert the picture(s).
Insert Sounds into Your Presentation
PowerPoint comes complete with a searchable array of sounds that you can use in your class presentations. You can download additional sounds from the Microsoft Clip Art and Media Gallery. New media is added all the time!
Just like when you want to insert Clip Art pictures into your presentation, you would select Clip Art from the Picture sub-menu on the Insert menu to open the Clip Art search panel to search for available sounds. When you locate and insert the one you want to use, you will be presented with a dialog box asking if you want your sound to play automatically in the slide show.

If you answer Yes, your sound will play right away when the page you are on is displayed during your presentation. You would answer No if instead you want to have the sound remain silent until clicked. (You can change this setting later in the Custom Animation panel.)
What if you have your own sounds, stored on your computer or a CD-Rom, that you would like to use in your presentation?
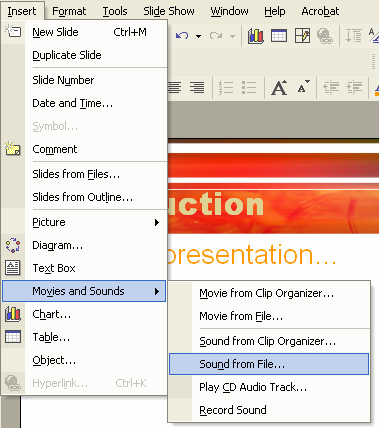
Select Sound from File... from the Movies and Sounds sub-menu located on the Insert menu.
You would then be presented with a dialog box with which you could navigate through to locate and insert the sound(s). Select any of the following types of sounds for your presentation.
- AIFF Audio File (*.aif, *.aifc, *.aiff)
- AU Format Sound (*.au, *.snd)
- MIDI Sequence (*.Mid, *.rmi)
- MPEG Layer 3 Audio (*.mp3)
- WAVE Audio File (*.Wav)
- Windows Media Audio File (*.wma)
Insert Movies into Your Presentation
You can insert your own digital videos into your presentation.
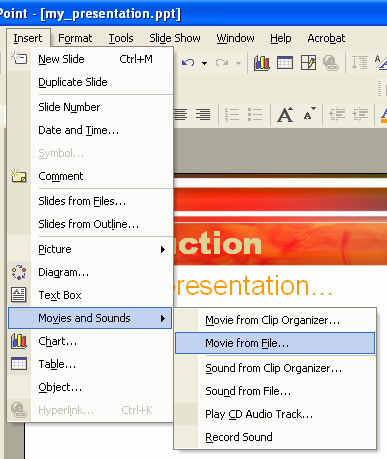
Select Movie from File from the Movies and Sounds sub-menu located on the Insert menu.
You would then be presented with a dialog box with which you could navigate through to locate and insert the movie(s). Select any of the following types of movies for your presentation.
- Movie File (*.mpg)
- Video Clip (*.avi)
- Windows Media Video File (*.wmv)
If you create your video on a Mac, be sure that the filename includes the file extension. For example, if your filename was myVideo.mov, then the .mov would be the file extension.
When you locate and insert the one you want to use, you will be presented with a dialog box asking if you want your movie to play automatically in the slide show.
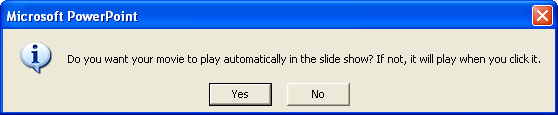
If you answer Yes, your movie will play right away when the page you are on is displayed during your presentation. (You can change this setting later in the Custom Animation panel.)
About Viewing Your Presentation on Blackboard
When you want to playback your presentation anywhere but on the original computer that you used to create it, one of the most important considerations is to ensure that all of the media files are available for playback. That's one reason why uploading your presentation to Blackboard can be difficult.
There are two approaches you can take. The first is to ensure that all of the media is embedded in your presentation, so that it will playback without the presence of your original media files. The problem with this method is that there is no way to embed movies. The second method is to package your PowerPoint presentation along with the necessary media files. Doing so will ensure that wherever you open the package, all of the files that you need to view the presentation will be there. The downside to this method when it comes to Blackboard is that when you package your presentation, it will have to be downloaded and opened before it can be viewed.
So, there's no one best way to prepare your presentation for playback. You'll have to decide which method will work best for your project. You'll need to be sure to include instructions so that others who want to view your presentation from Blackboard will know whether or not they need to download and unpackage your files!
Embedding Media for Playback on Blackboard
If you want your presentation to play from Blackboard without having to be downloaded, make sure all of the media files are embedded. Remember that this won't work for movie files. The following explains how to ensure your pictures and sounds are embedded.
Pictures - when you insert a picture from a file in PowerPoint. They should be embedded by default. In order to link them, you would need to select the Link checkbox when you import.
In PowerPoint 2002, there is no Link checkbox on the dialog box to insert a picture from a file. Don't worry; your file will be embedded.
Sounds - PowerPoint can only embed WAVE Audio Files (*.Wav), so be sure to create your sounds in this format if you want to embed them. PowerPoint is configured by default to link to sound files over 100 KB. You can increase that from 100 KB to accomodate your largest sound file.
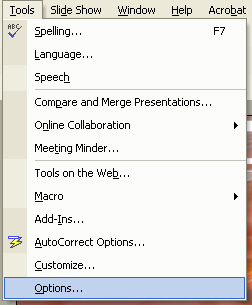
Select Options from the Tools menu.
You will be presented with the Options dialog box. Click on the General tab. Enter 10000 in the entry box next to the text: Link sounds with file size greater than...
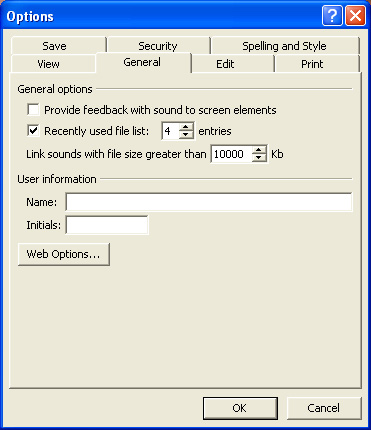
With this setting, sounds under 10 MB will automatically be embedded in your presentation. You can set that file size higher to accomodate larger sound files. Keep in mind that your PowerPoint file will be much larger as a result. Very large files can be difficult to playback over the web. If your presentation turns out to be a large file, you may want to have viewers download your presentation before trying to play it.
When you've completed your presentation, upload your single PowerPoint file (*.ppt) to Blackboard.
You can attach this file to a Discussion Board area, or upload it to a File Exchange area, the digital Dropbox, etc. You will be able to open and playback the presentation from Blackboard by clicking on the link created when you upload it.
Packaging Your Presentation for Blackboard Using Pack and Go
Using the Pack and Go method will help you to ensure that all of your files are included when you playback your presentation on another computer. The PowerPoint Pack and Go wizard will walk you through the process of packaging your presentation for playback on another computer or over the web.
Select Pack and Go from the File menu.
Follow the instructions in the Pack and Go Wizard dialog box. Be sure to check the box that says: Include linked files.
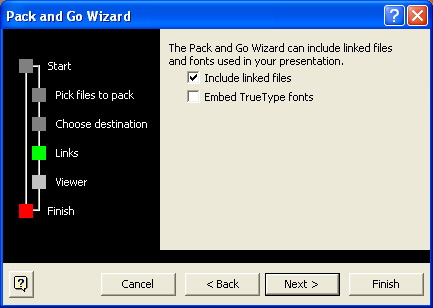
Include the Microsoft PowerPoint Viewer in the package in case the computer on which your presentation is viewed does not have PowerPoint installed.
When you're finished, you will end up with 2 files: PNGSETUP.EXE and PRES0.PPZ.
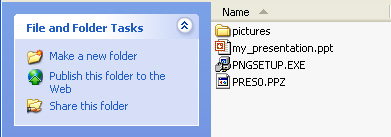
Both of these files need to be uploaded to Blackboard. Zip the files to upload them to Blackboard in a single package. If you have Winzip, you can right-click on the files and use the Winzip sub-menu to zip them.
After you upload your zipped package, you can download your presentation by clicking on the link created and selecting Save. When the package is downloaded, unzip it and run the PNGSETUP.EXE. Your presentation will be extracted to a folder that you specify. After all of the files are extracted, you will be able to playback your presentation.
Packaging Your Presentation for Blackboard Using Save as Web Page
Saving your presentation as a web page will help you to ensure that all of your files are included when you playback your presentation on another computer.
Select Save As Web Page from the File menu. You will be presented with a Save As dialog box.
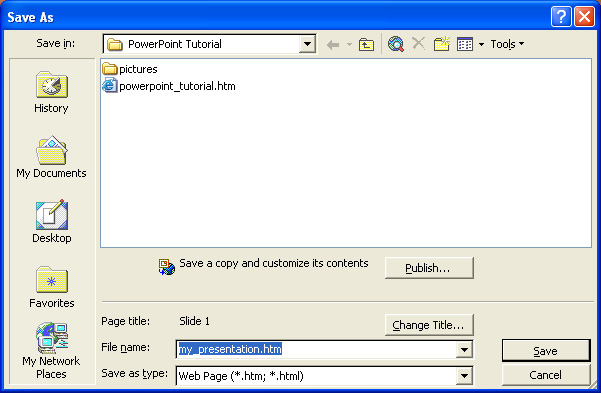
Click on the Publish button to customize your presentation.
You will be presented with the Publish as Web Page dialog box. Select the options you want then click Publish.
This will create an HTML (*.htm) file and a folder which will contain your media files. The file and folder will be saved in the location on your computer that you specified. This file and folder could be posted to the web and your presentation could be viewed on virtually any computer with web access. However, Blackboard will not allow you to create custom web pages as a student. Instead, you will zip the files to upload them to Blackboard in a single package. If you have Winzip, you can right-click on the files and use the Winzip sub-menu to zip them.
After you upload your zipped package, you can download your presentation by clicking on the link created and selecting Save. When the package is downloaded, unzip it and double-click on the HTML (*.htm) file to playback your presentation.